Cherenkov Example
This example shows how to activate Cherenkov radiation in a GEMC detector. The three radiator names are neutral demonstration labels. Their optical constants may be unphysical and should not be read as definitions of real materials.
You can run this example in your browser: ![]()
Quickstart
Copy the example to your current directory. To create the geometry, run 1 event, and produce ROOT and CSV output files:
cp -r $GEMC_HOME/examples/optical/cherenkov .
cd cherenkov
./cherenkov.py
gemc cherenkov.yaml -n=1
Geometry
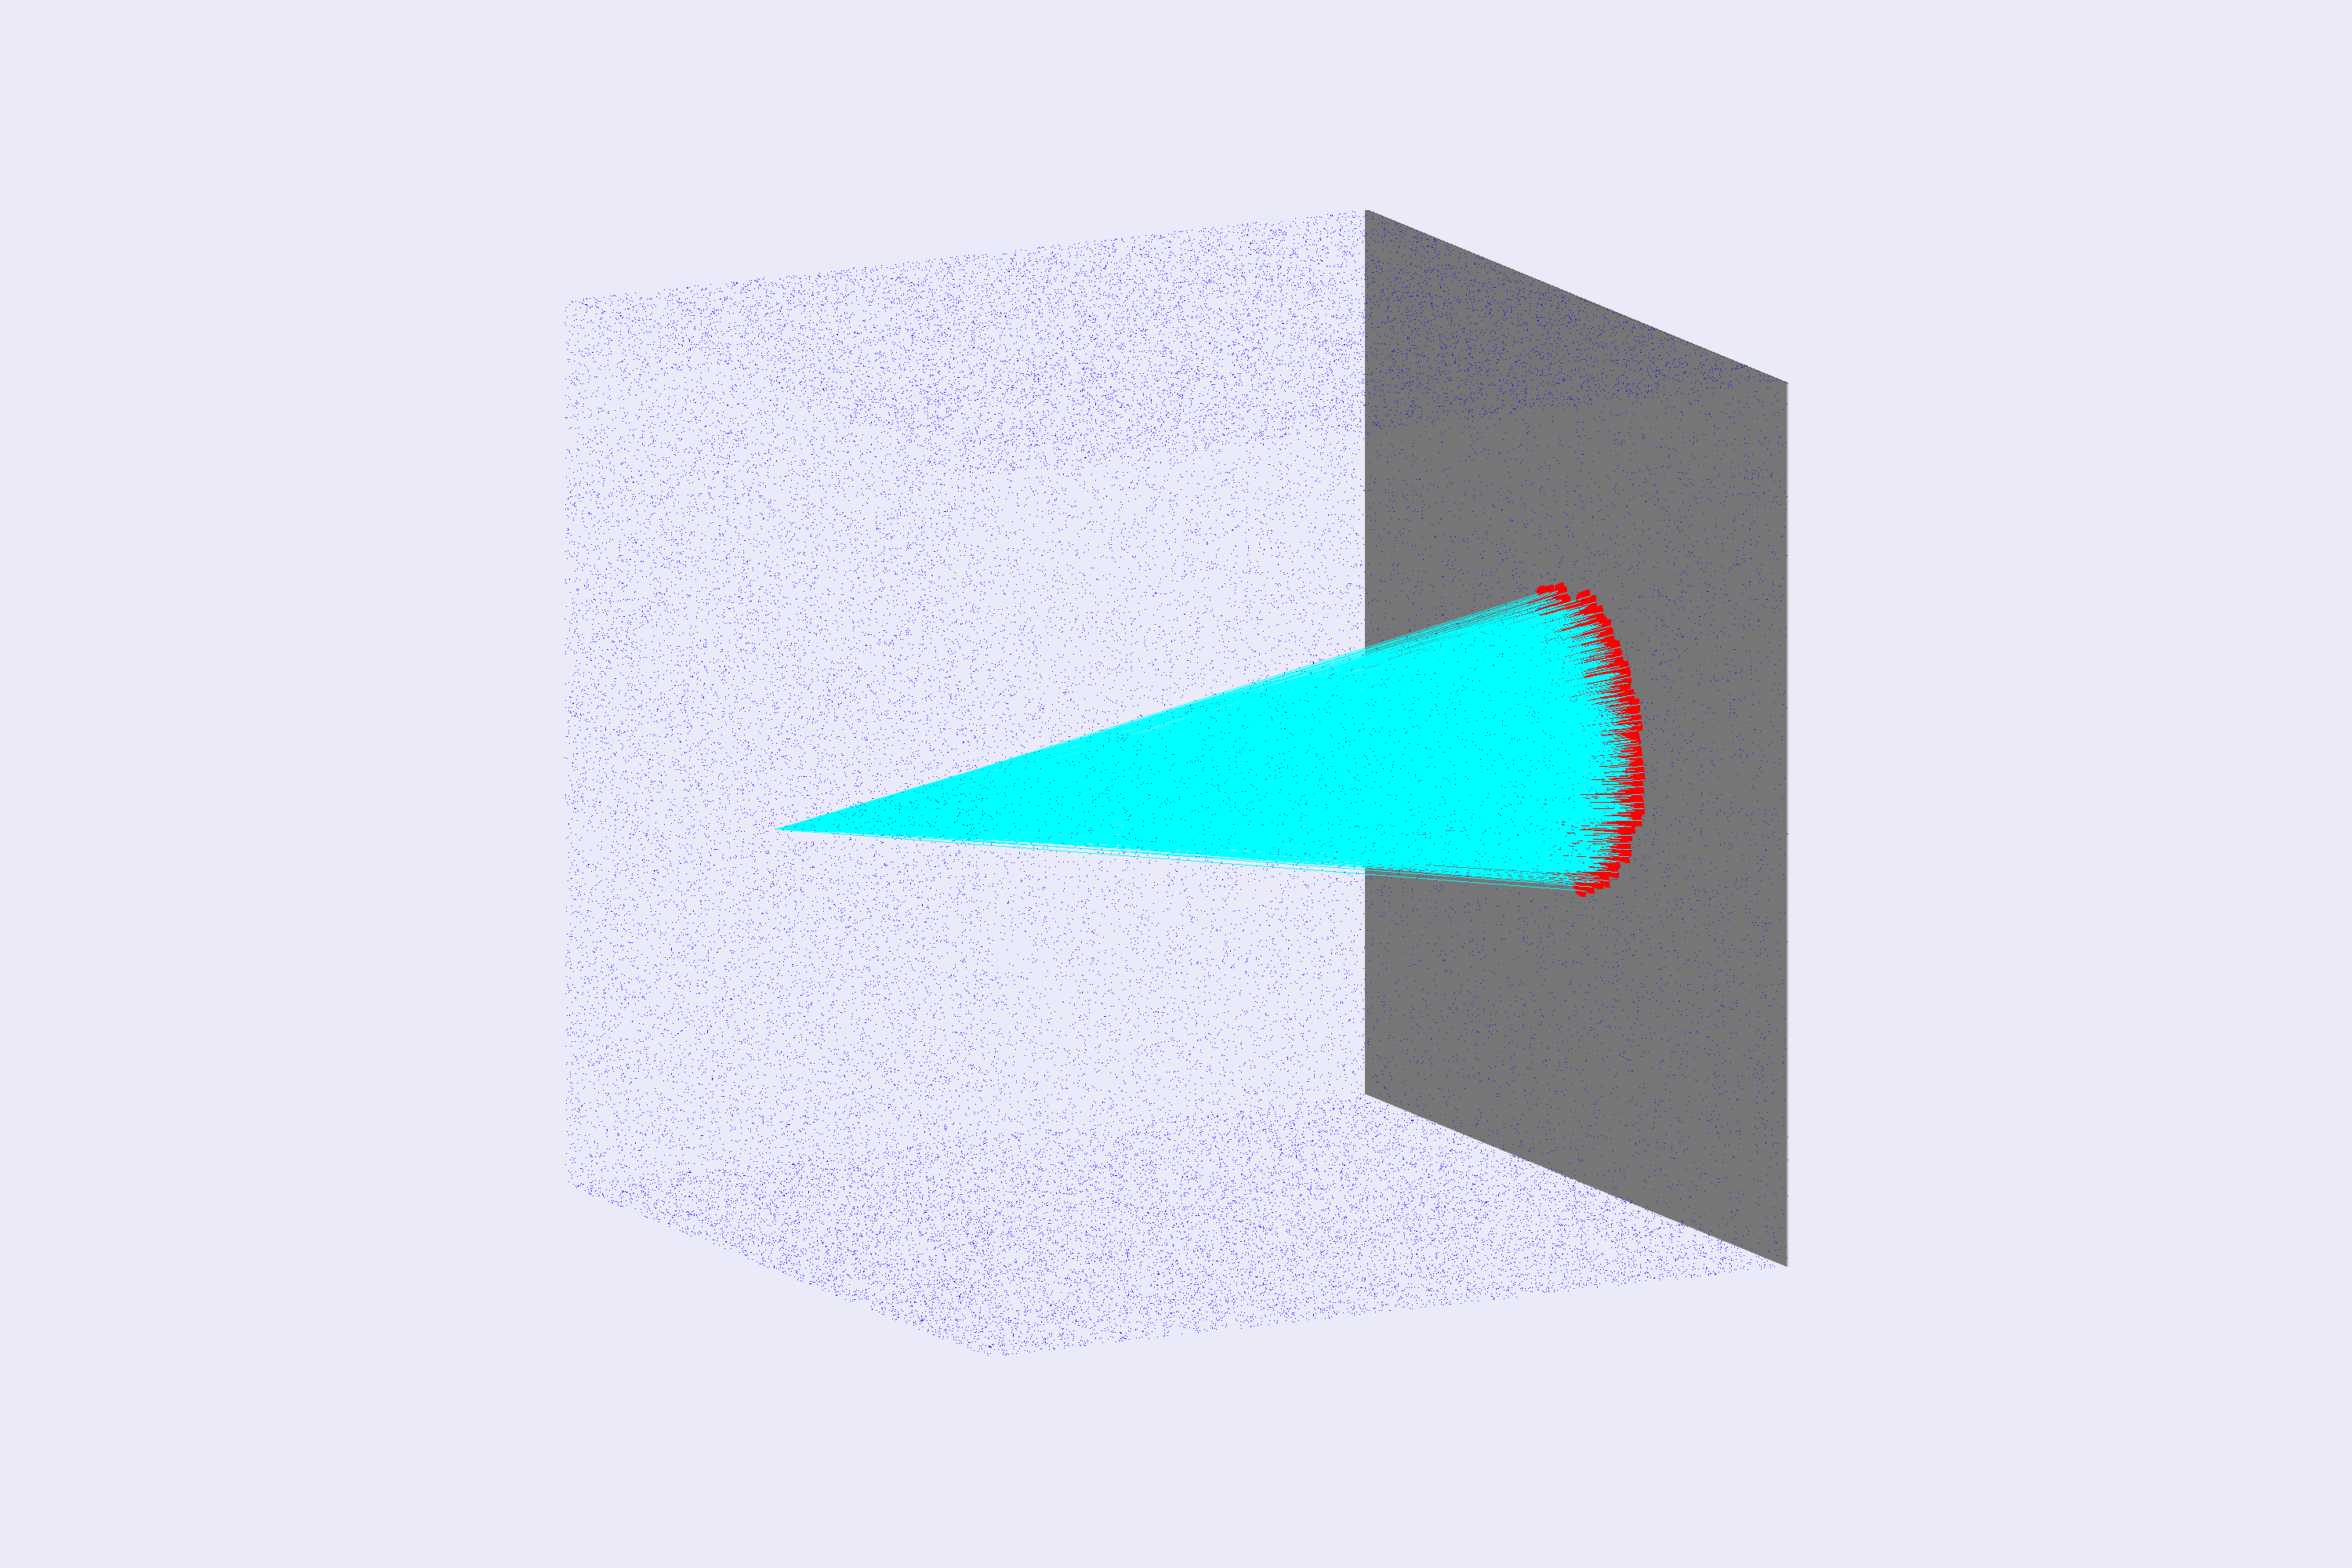
The geometry, shown below, is defined in cherenkov.py. It is produced in three variations:
default, mediumIndexRadiator, and highIndexRadiator.
The world (a box named root) contains a radiator box. The radiator material depends on the selected variation:
| variation | material | color | refractive-index range |
|---|---|---|---|
| default | lowIndexRadiator | red | 1.0010-1.0013 |
| mediumIndexRadiator | mediumIndexRadiator | blue | 1.0110-1.0150 |
| highIndexRadiator | highIndexRadiator | green | 1.0500-1.0530 |
- a gPhotonDetector detector composed of four boxes (detector_left, detector_right, detector_top, and detector_bottom). This leaves a small hole in the center for the beam.
Interactive viewer:
Physics List
FTFP_BERT + G4OpticalPhysics is used by default in the YAML file. The optical physics component is required to produce optical photons.
phys_list
The physics list can be selected using the option
gemc -phys_list <value>where
<value>can be a combination of the Geant4 physics constructors separated by the+sign. For examplegemc -phys_list="FTFP_BERT + G4NeutronCrossSectionXS"To see a list of the available Geant4 constructors:
gemc -showPhysics
Generator
The particle kinematics are defined in the YAML file:
gparticle:
  - name: e-
    p: 1000*MeV
    vz: -50*cm
See also the Internal Generator Documentation for more information.
Digitization
The detector volume sensitivities are specified with the gPhotonDetector digitization (one of the available GEMC prebuilt routines)
in cherenkov.py.
The identifier is used to distinguish the different detector boxes:
backplate.digitization = "gPhotonDetector"
backplate.set_identifier("detector", panel_id)
See the Flux Documentation for more information.
Usage
Building the detector
Use the Python script cherenkov.py to build the detector. By default, the setup is stored in a SQLite file
named gemc.db. Command-line options can define the database type, variations, and run number.
See also the Building Geometry for more information.
Running GEMC
The file cherenkov.yaml can be used to run the setup. Add -gui to run interactively:
gemc cherenkov.yaml -gui
The YAML sets g4view.cloudPoints: 60000 so cloud-style volumes are dense enough for the rendered geometry screenshots.
Modify cherenkov.yaml as needed, in particular to add particles, control the number of threads, or change the output.
The gPhotonDetector digitization records optical photons even when they deposit zero energy, so recordZeroEdep
is not required for this example.
Variations
Within the YAML file, the variation is set to mediumIndexRadiator. You can replace it with default or highIndexRadiator to change the material. For example:
gsystem:
  - name: cherenkov
    variation: highIndexRadiator
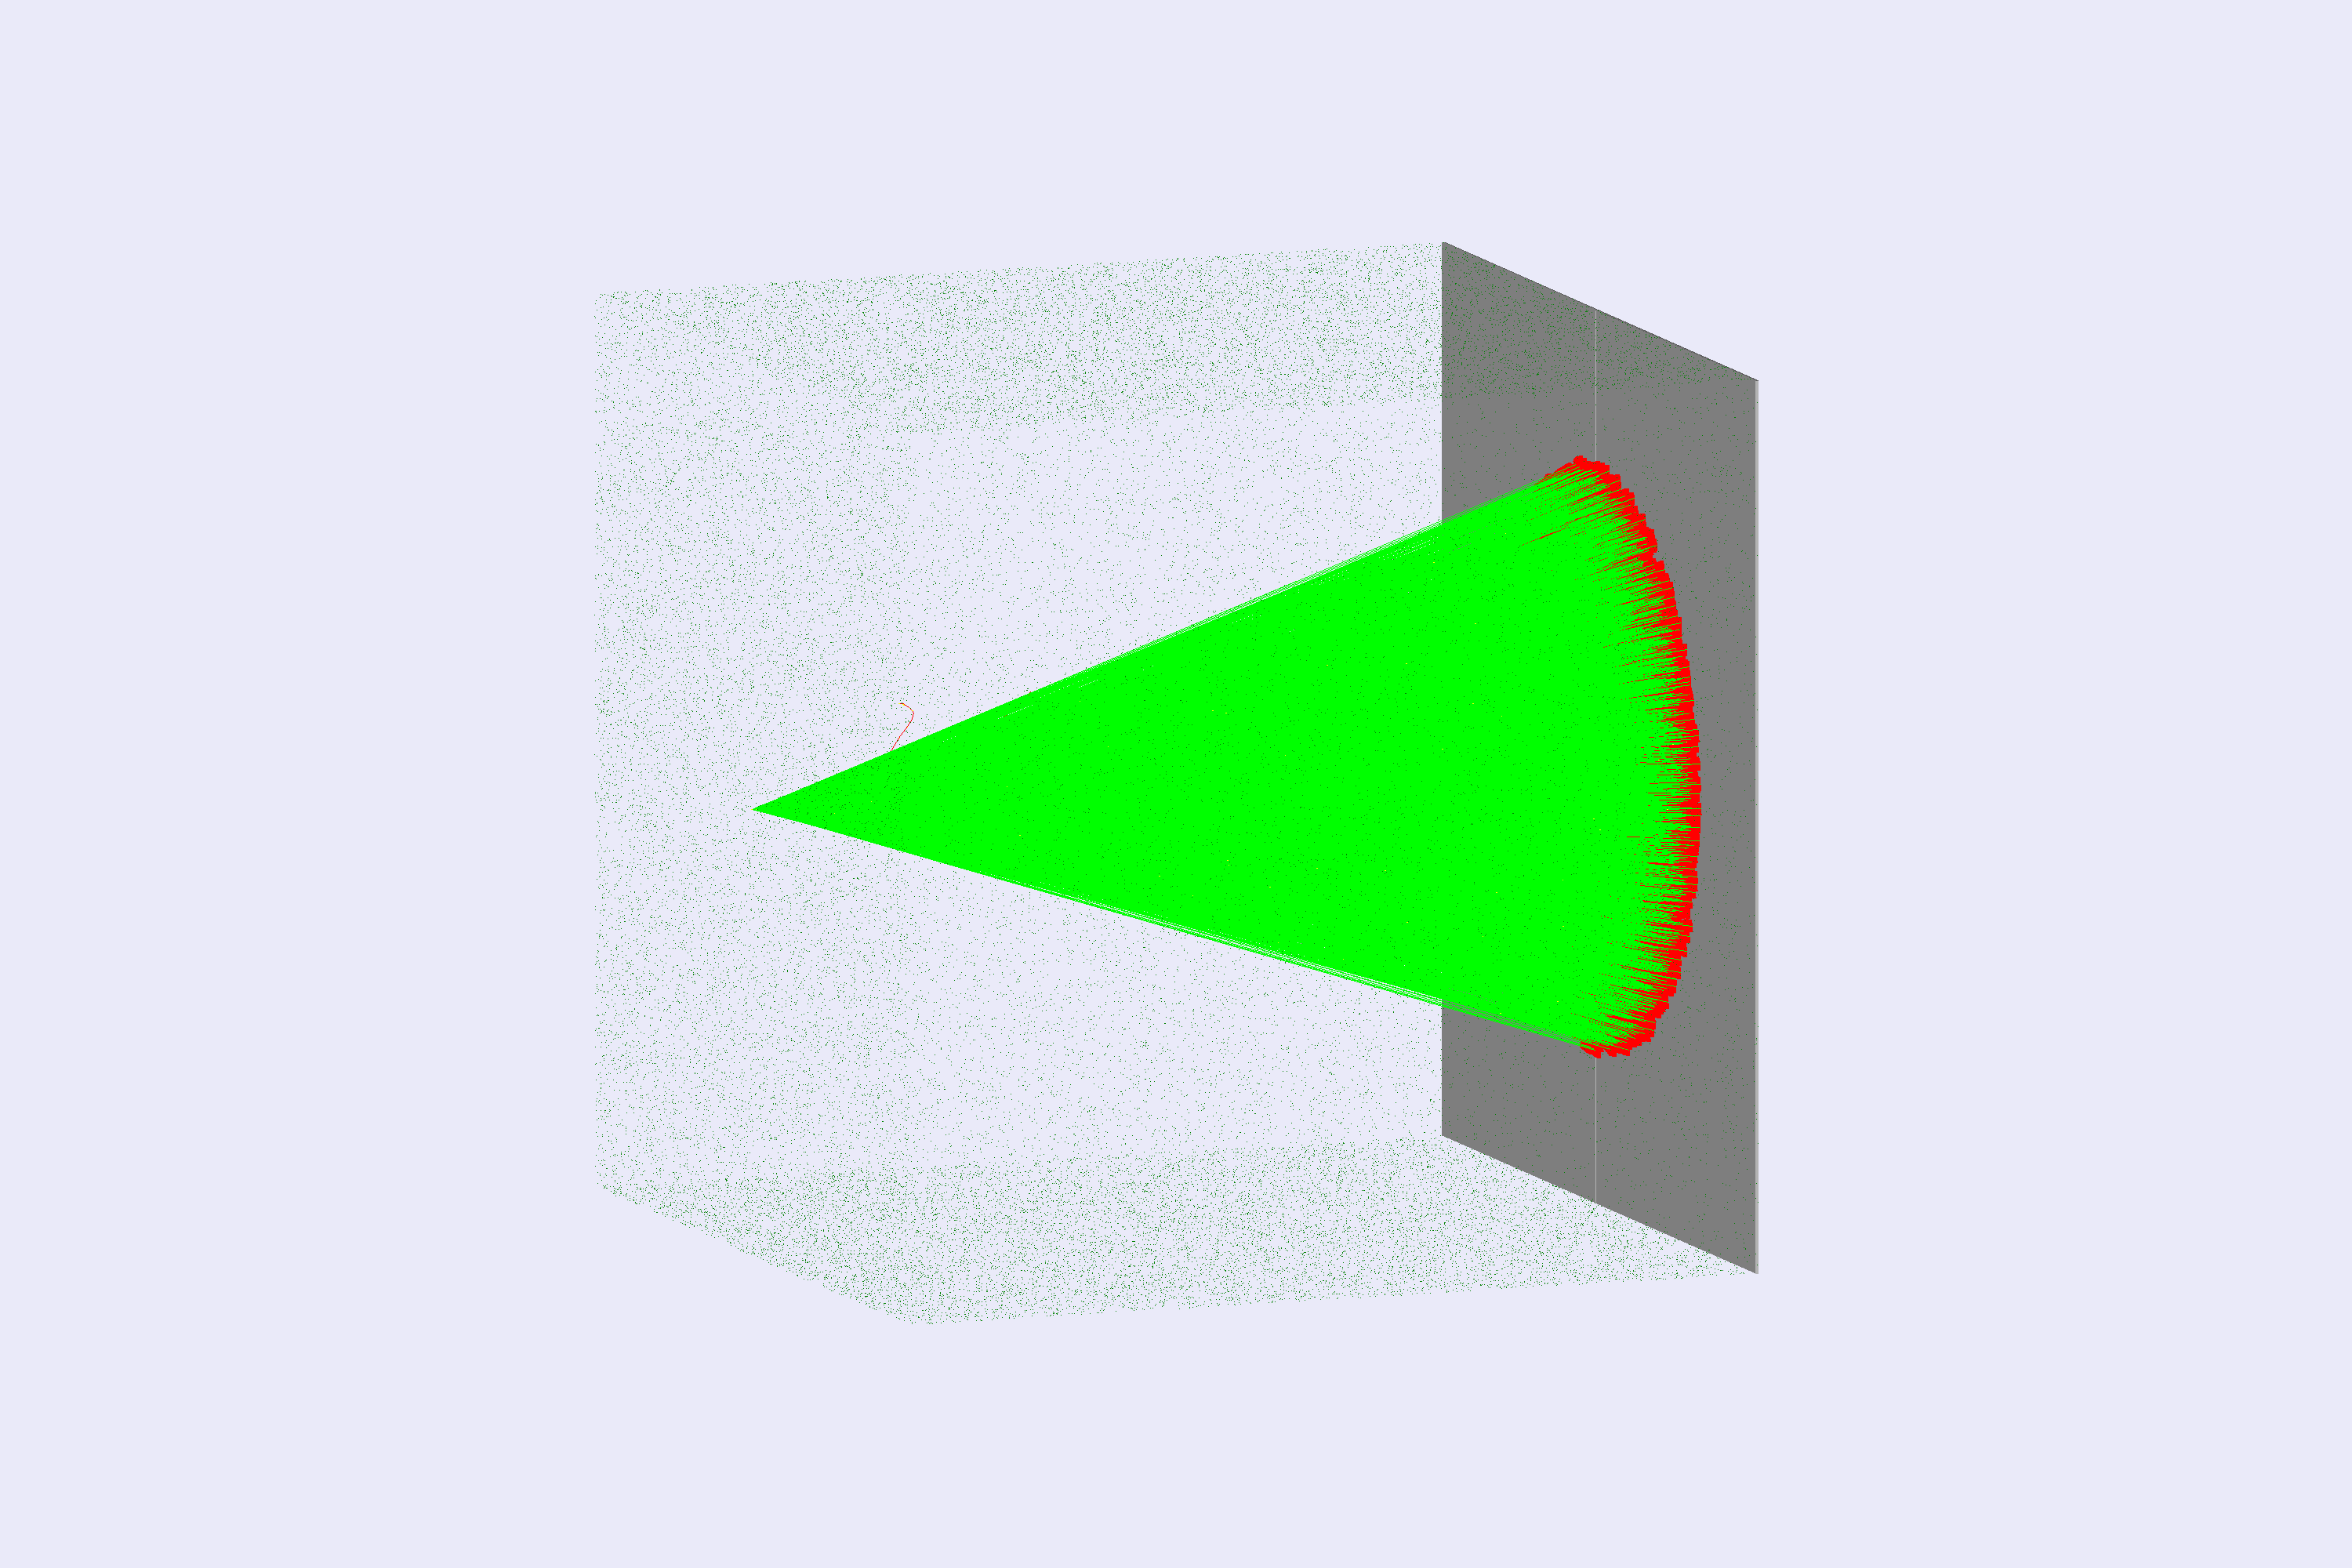
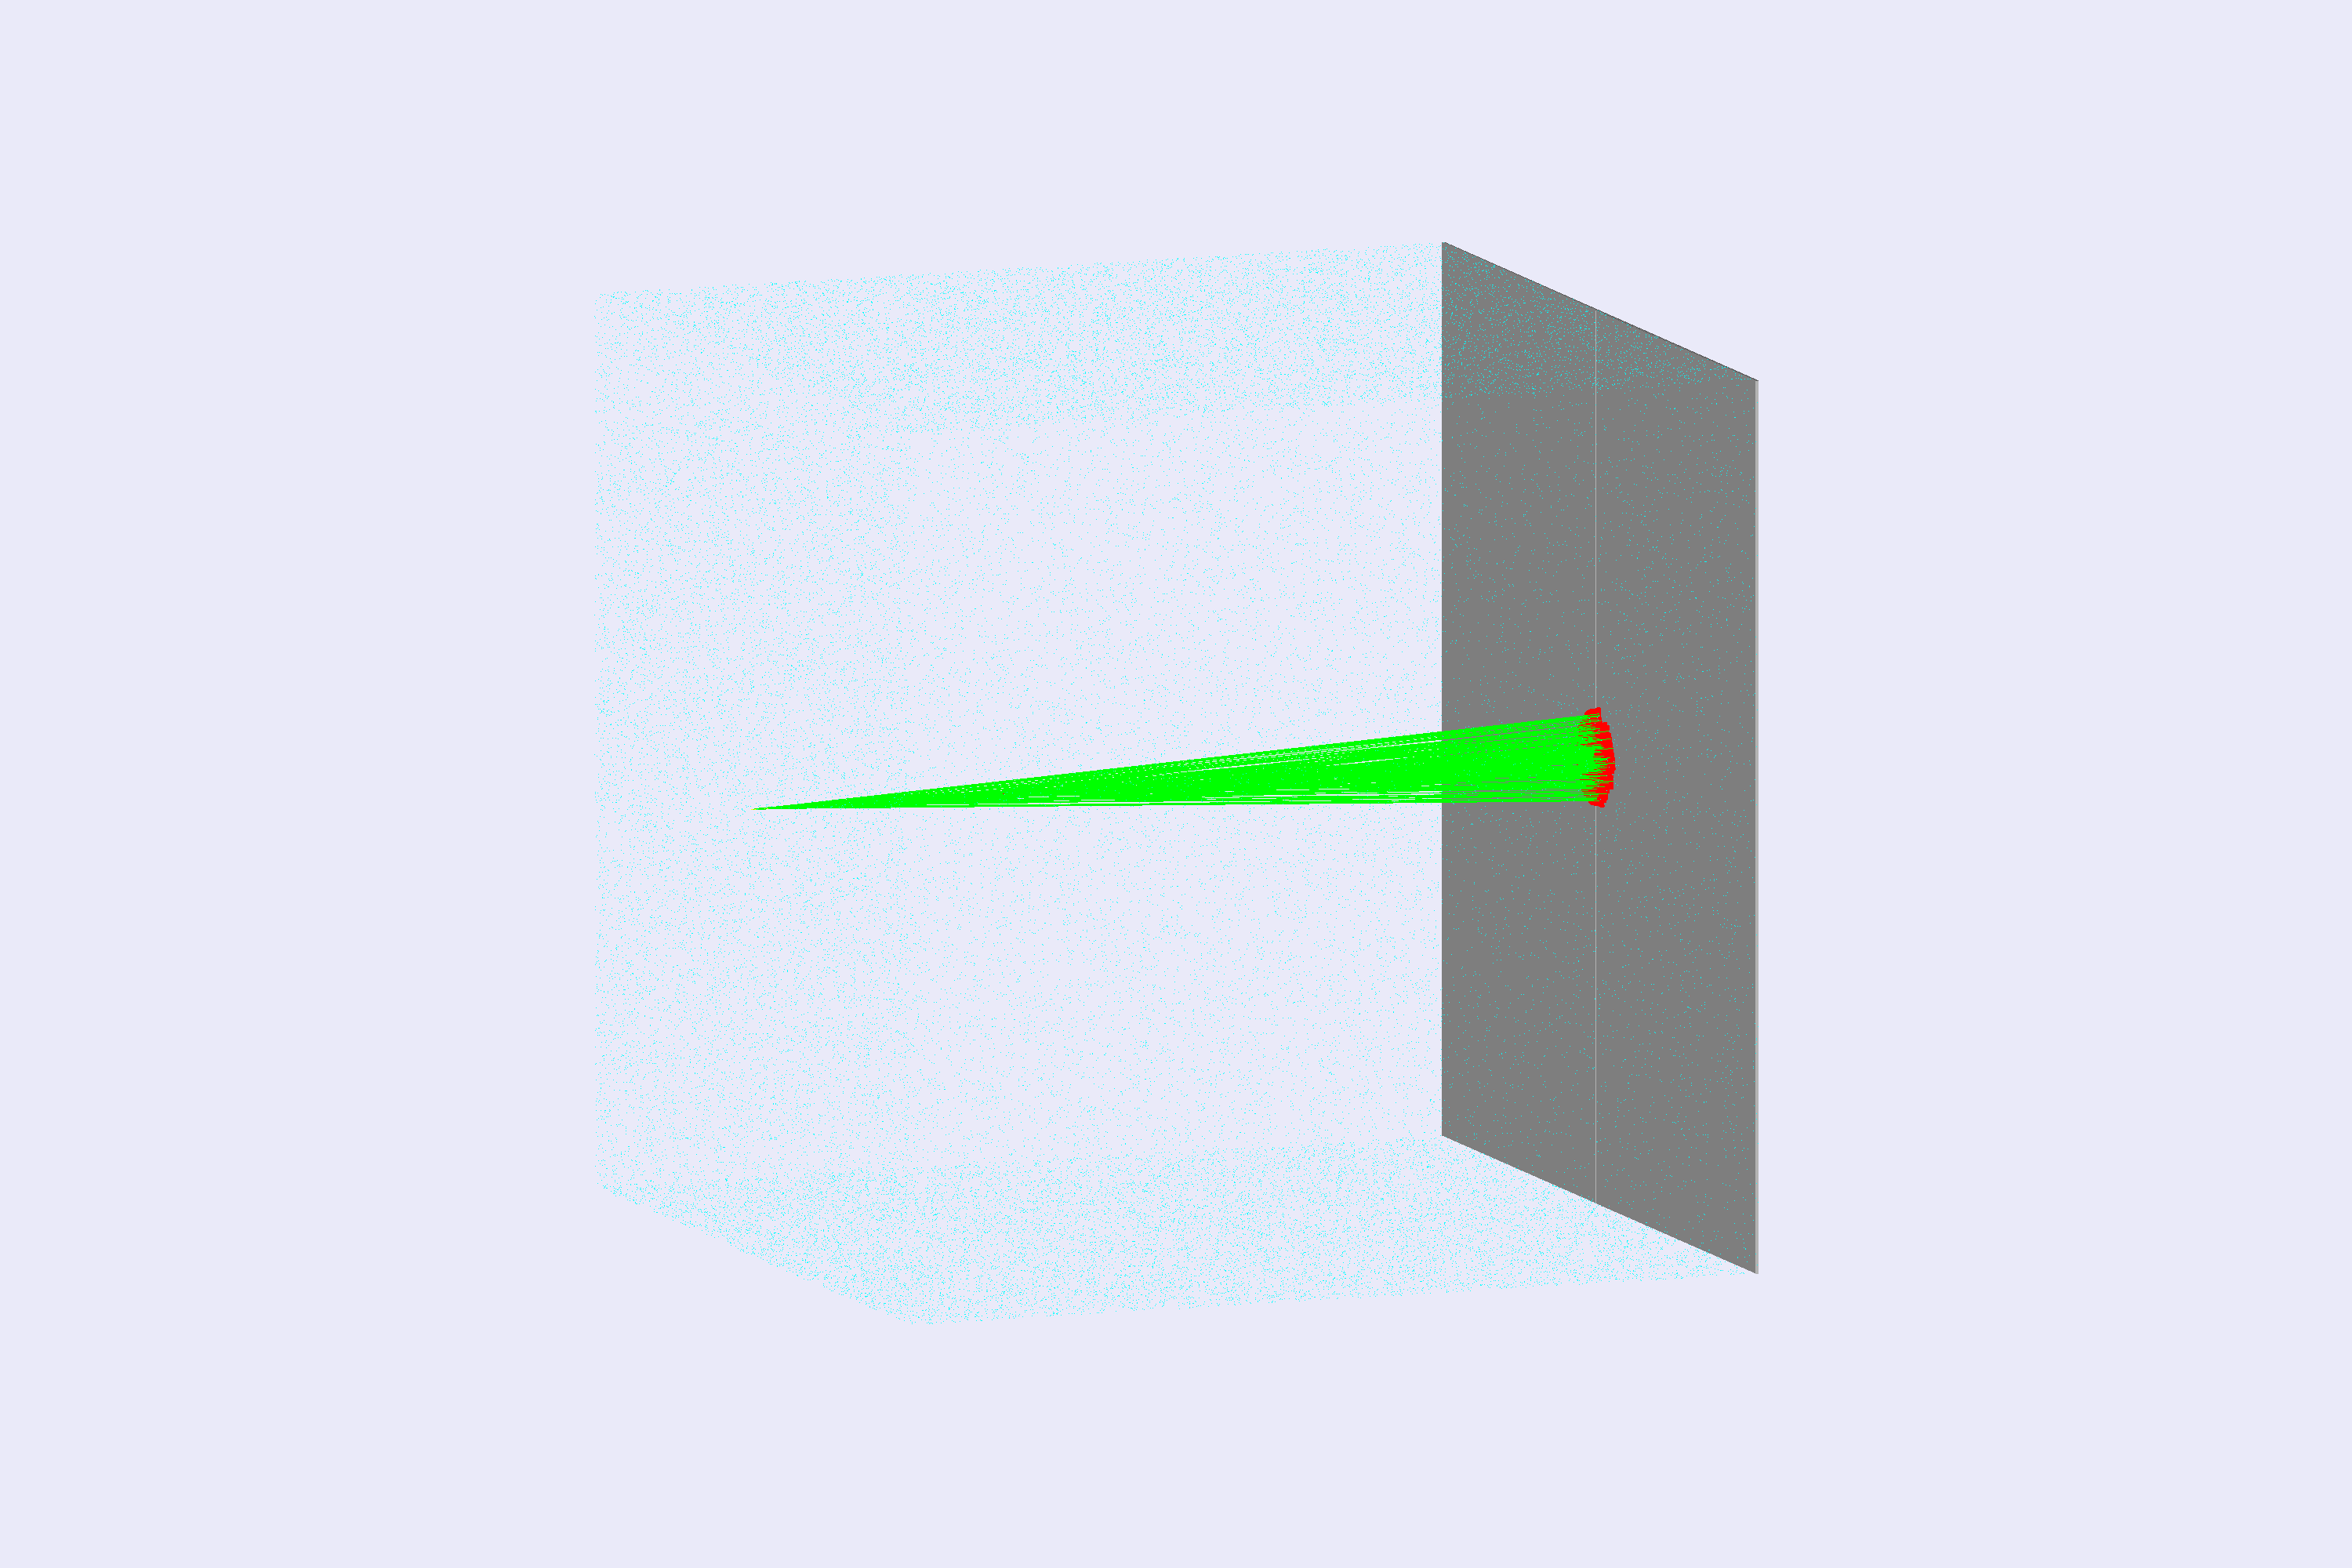
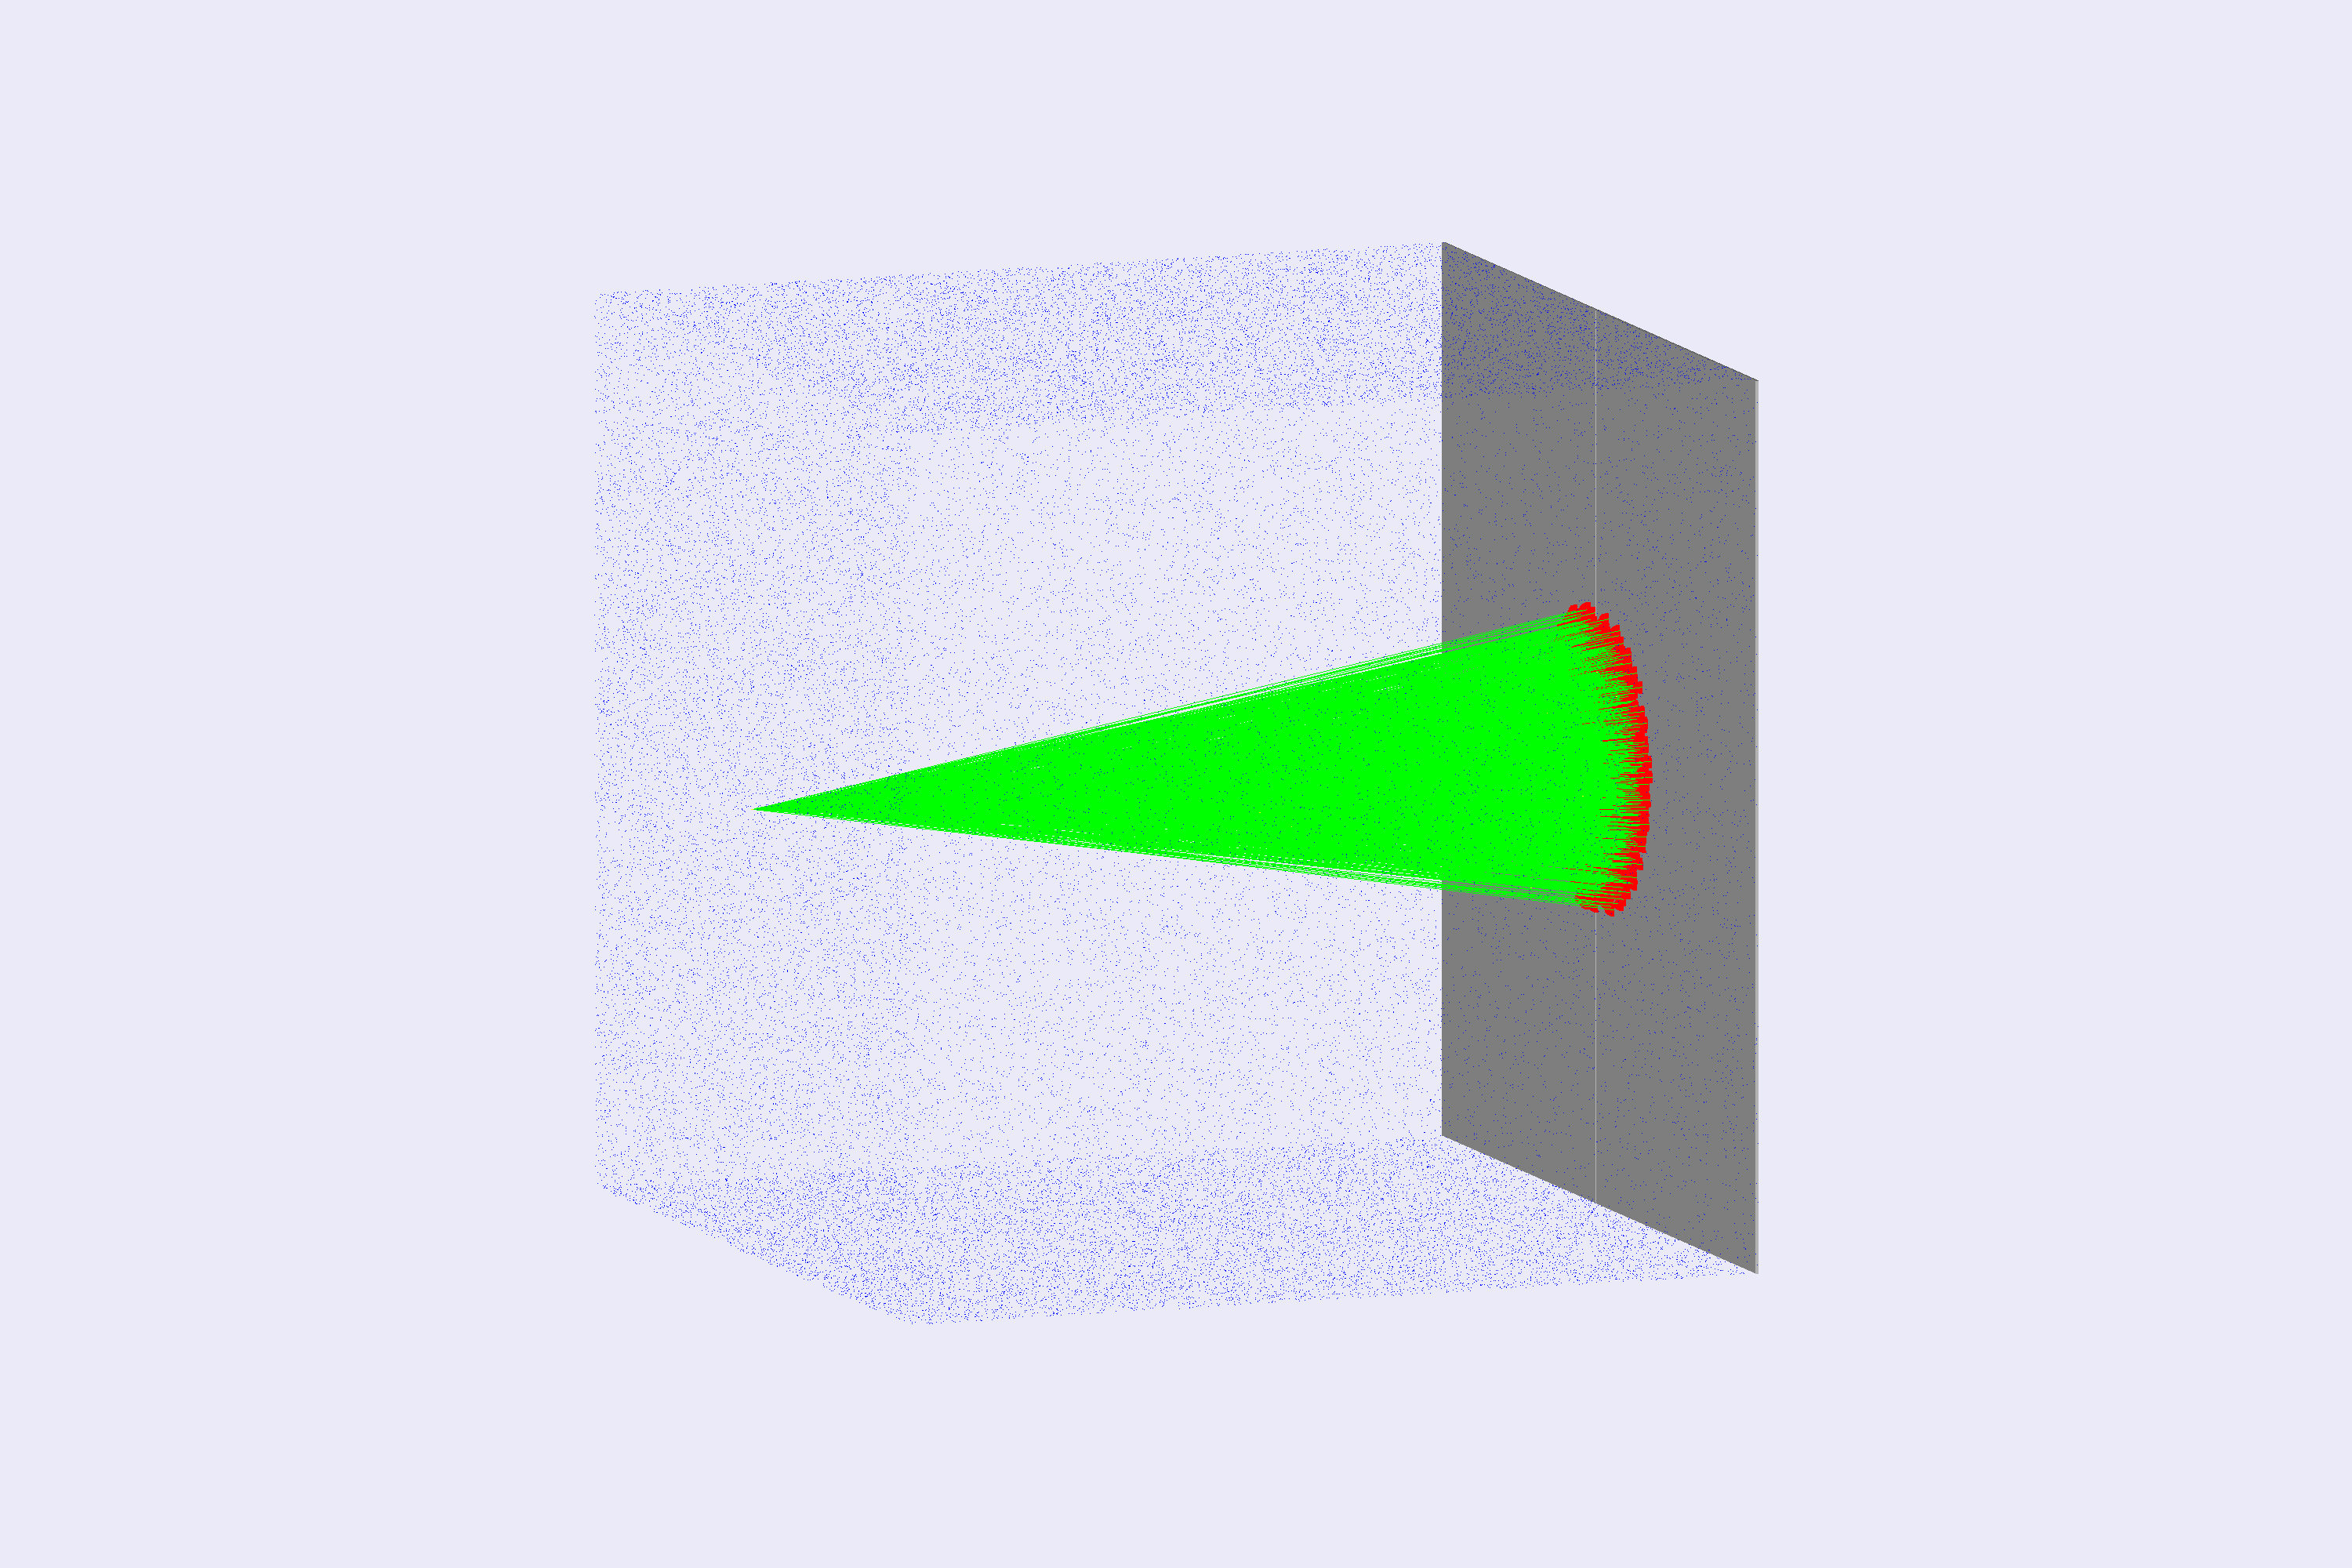
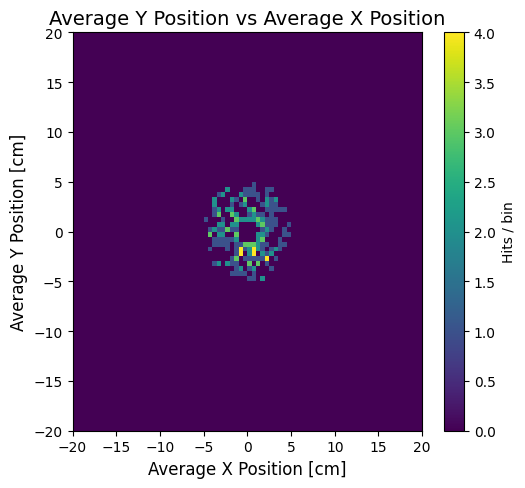
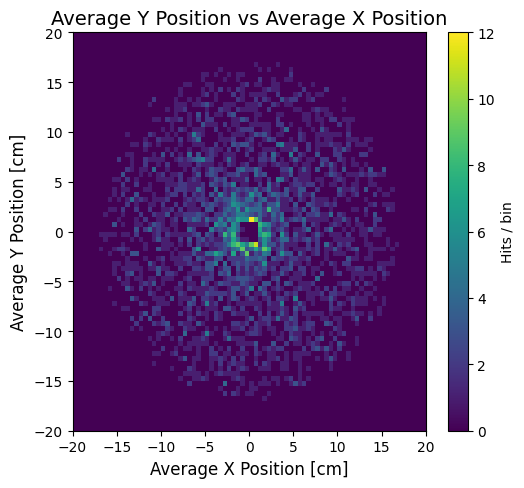
Different radiator materials produce different photon yields and angles, as shown below. Their optical constants are demonstration values and may be unphysical. Use the variation name in the gstreamer filename when you want separate output files for each variation.
 |
 |
|
 |
 |
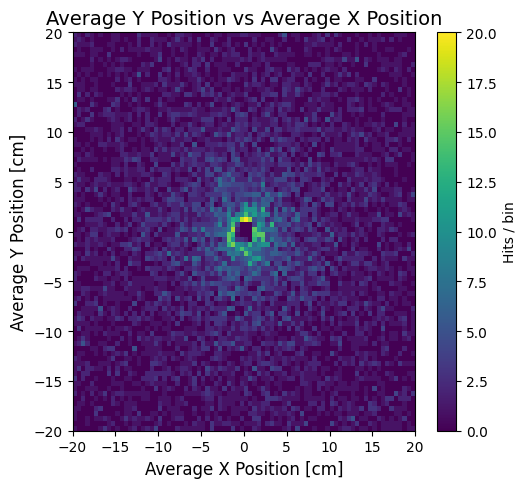 |
Left: lowIndexRadiator, Center: mediumIndexRadiator, Right: highIndexRadiator.
Running Events
Output
The gstreamer option selects the output filenames and the format:
gstreamer:
  - format: csv
    filename: cherenkov
Because gPhotonDetector is a per-event digitization, GEMC will produce one output file per thread.
For ROOT files, you can use hadd to merge the files.
See also the Output Documentation for more information.
Plotting with the GEMC Analyzer
Run GEMC with 1 events first. The default YAML file writes the analyzer CSV streams.
gemc cherenkov.yaml -n=1
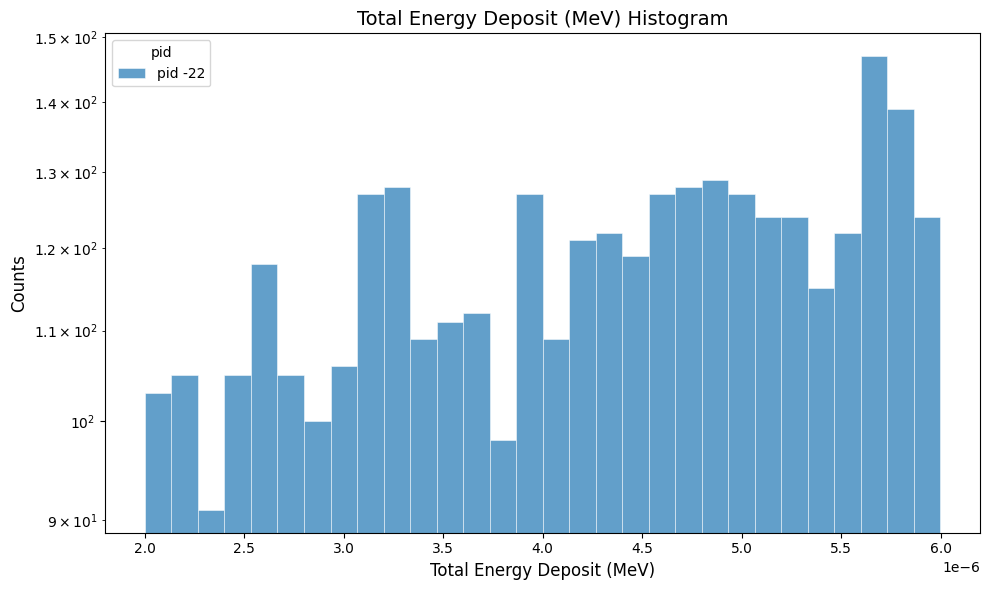
Plot the total energy deposited per hit:
gemc-analyzer cherenkov_t0_digitized.csv totEdep --kind csv
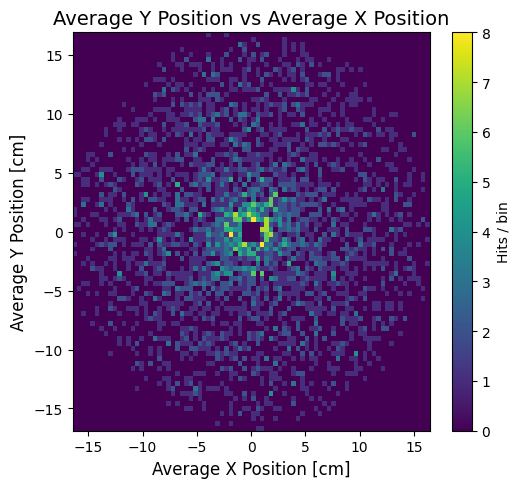
Plot the y vs x hit positions:
gemc-analyzer cherenkov_t0_true_info.csv --kind csv --data true_info --plot yvsx --bins 80